How to use IP Iran on Mac

To connect on Apple laptops, please follow the steps below.
Please note that the images may look slightly different from your laptop due to different Mac versions, but in general these settings are similar on Apple laptops.
First step:
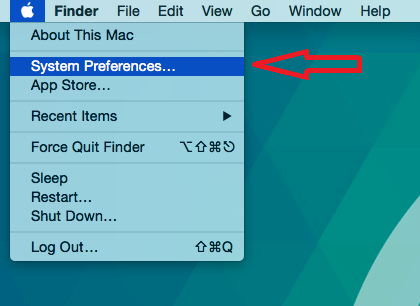
As shown in the image below, click on the Apple in the corner of the image and select System Preferences from its submenu.
Second step:
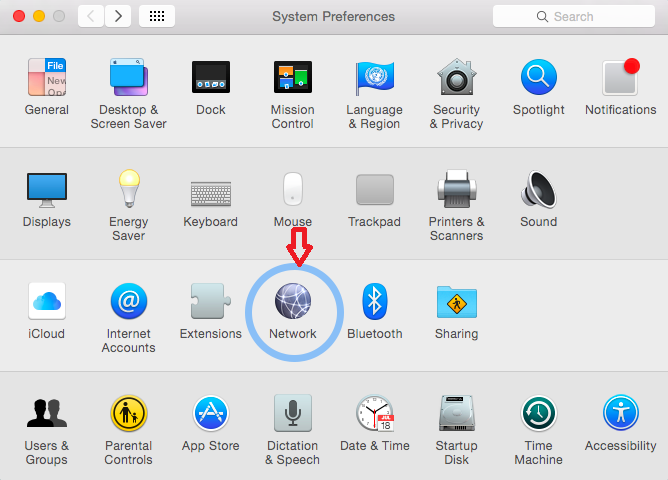
Click on the Network icon.
Step three:
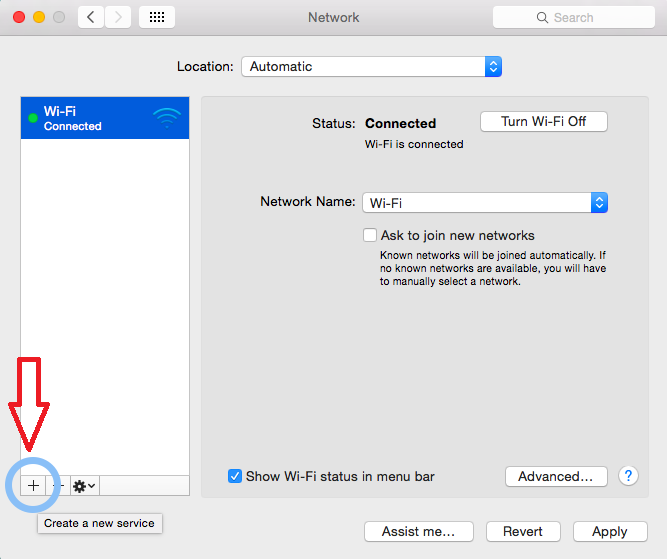
Click on the (+) in the lower left corner of the window.
Step Four:
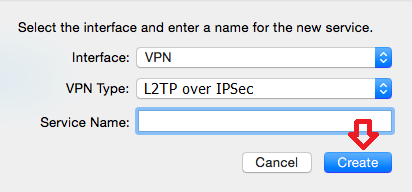
As shown in the image below, set Interface to VPN and VPN Type to L2TP Over IPSec , enter the word iranip in front of Service Name , and click Create .
Step Five:
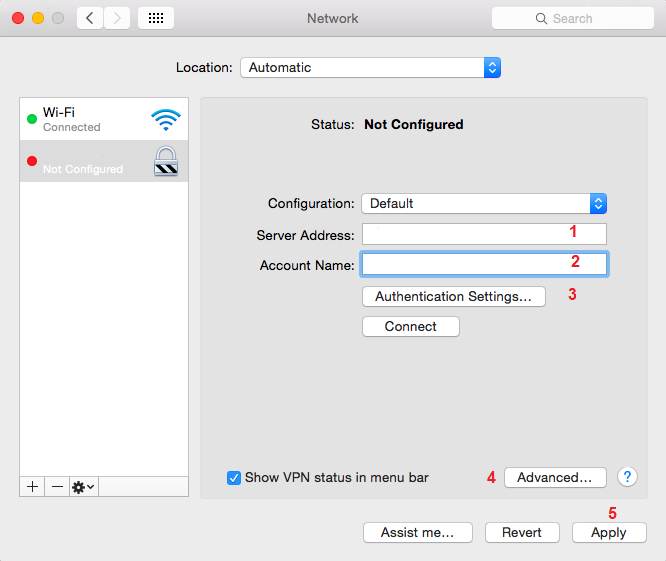
Make the settings according to the numbers in the image below:
1: Enter one of the servers below based on your subscription type.
Bank access server:
su.iran-ip.com Asiatech – Tehran
su2.iran-ip.com Simin – Tehran
su3.iran-ip.com Shahriar – Tabriz
2: In the Account Name field, enter the username received from the store.
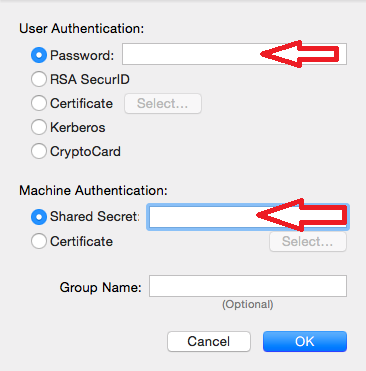
3: Click on Authentication Settings and in the Password field, enter the password received from the store and enter the value irip1234 in front of Shared Secret and click on Ok .
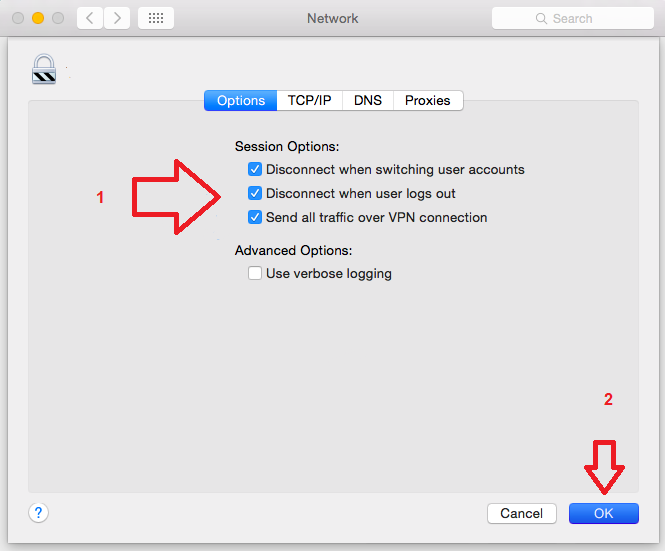
4: Click on Advanced , check Send all traffic over VPN connection and click on Ok .
5: Click Apply .
Please enter your input information such as server addresses, Shared Secret, username, and password using English letters and numbers, and avoid copying and pasting them.
Step Six:
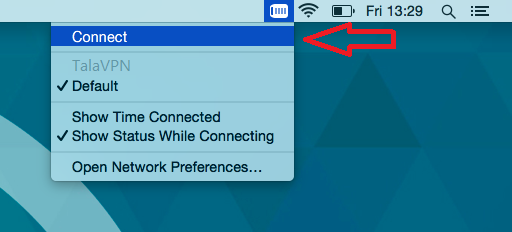
Now connect using the created connection as shown in the image below.
You can now use your service.
If you have any problems or questions about this tutorial, please contact support.

